Getting Started
Once Leapfrog Geo is installed, there are some first steps to carry out before you begin working with projects. This topic describes those first steps and then provides an overview of Leapfrog Geo project files. This topic is divided into:
- Licensing Leapfrog Geo
- Signing in to My Leapfrog
- Graphics and Drivers
- The Leapfrog Geo Projects Tab
- Managing Leapfrog Geo Projects
Once you have carried out these first steps, see An Overview of Leapfrog Geo for a brief description of the different parts of the Leapfrog Geo main window. For more detailed information on using the controls in the different parts of the main window, see the following topics:
Licensing Leapfrog Geo
To run Leapfrog Geo, you need a licence. There are two types, one that requires a Leapfrog USB dongle and one that requires the entry of a code.
Dongle Licences
If you have a USB dongle and need to activate your licence, plug the dongle in to your computer and start Leapfrog Geo. Leapfrog Geo will check the dongle and prompt you to start the activation process. Follow the instructions that appear on the screen.
If the licence cannot be installed, contact Customer Support as described in Getting Support.
If you have an OnDemand licence, you will be prompted to check out days. In the window that appears, the bars show the maximum checkout period, divided into blocks; each block represents one day. Green blocks are active days remaining on your licence, and blue blocks are days available for checkout. Click blue blocks to select additional days; the blocks will turn orange to indicate the additional days you will be checking out.
You may also have module licences available, in which case you can click on the button for that licence and select the required number of days:
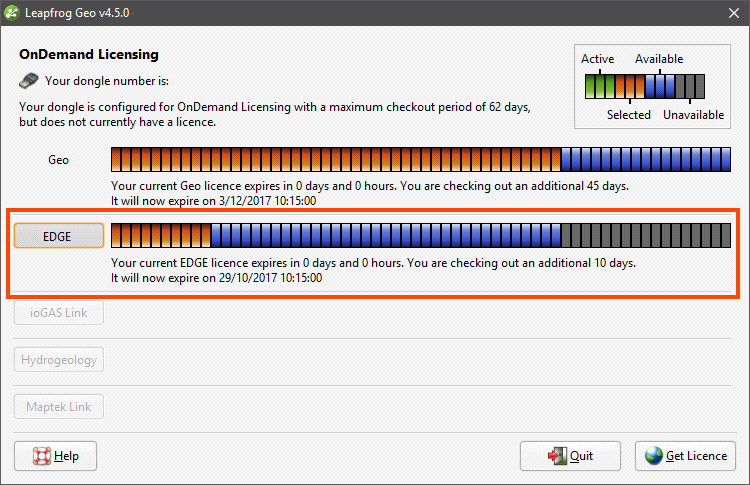
Click Get Licence to update your licence and check out the days indicated in orange.
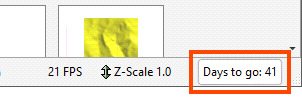
Once Leapfrog Geo is running, you can check out additional days by selecting Extend Licence from the Leapfrog Geo menu or by clicking on the button at the bottom of the main window:
Once the licence has been activated, the licence details will be displayed. The Module Licences tab shows whether you have licences for any specialist modules.
If your licence has already been activated and you wish to activate or extend a module licence, select Install Licence (for a normal licence) or Extend Licence (for an OnDemand licence) from the Leapfrog Geo menu.
Code Licences
You may have a licence that requires the entry of a code. Start Leapfrog Geo and click Enter Licence Code in the window that appears. Enter the code you have been given and click Get Started.
You can copy the licence code from the email or document you received and paste it into the first Licence Code field.
If the code cannot be validated and you are sure you have entered the code correctly, contact Customer Support as described in Getting Support.
Signing in to My Leapfrog
The User Identity menu in the upper right-hand corner of the main window is used to sign in to My Leapfrog.
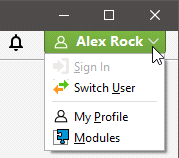
Signing in also signs you in to View, so you can upload scenes to View.
Graphics and Drivers
Many laptop computers come with two graphics options: low-powered graphics integrated into the CPU and a high-performance dedicated graphics option (a GPU). To save power, often the laptop’s default setting is to run programs using the slower integrated graphics option. However, selecting high-performance graphics options is very important to Leapfrog’s performance. If you have a dedicated graphics option, you should be using it. It’s also important to have the most up-to-date drivers to make the most of your computer’s capabilities.
To determine what graphics capabilities your computer has:
1. From the Leapfrog Geo menu, select About.
2. Click on the System Info tab.
Under the Summary, you will see the following details:
- Graphics in use by shows the graphics option being used. Note that Leapfrog Geo uses only the option indicated; if there are two options available, Leapfrog Geo does not use both simultaneously.
- All available graphics hardware lists the options available. If there are two options listed, you will want Leapfrog Geo to use the dedicated graphics option rather than the slower integrated graphics.
- Driver date shows the date at which the driver was last updated for each graphics option.
If your graphics drivers are out of date, it is recommended that they be updated prior to switching the graphics in use by Leapfrog Geo. To find more information:
- See the Advanced Troubleshooting Guides on the Leapfrog3D website for more information on how to update drivers for different types of dedicated graphics cards.
- Visit the My Leapfrog forums at https://forum.leapfrog3d.com/c/open-forum and search for “graphics”.
- Contact technical support as described in Getting Support.
Switching to High-Performance Graphics
If you have more than one graphics option available, ensure you are using the dedicated graphics capabilities to get the most out of Leapfrog Geo. The steps below apply to an NVIDIA driver and may be slightly different for other brands. Instructions for other brands can be found on the driver’s or laptop manufacturer’s website.
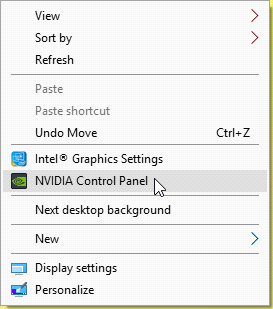
The first step is to open the NVIDIA Control Panel.
1. Right-click anywhere on your computer’s desktop and select NVIDIA Control Panel.
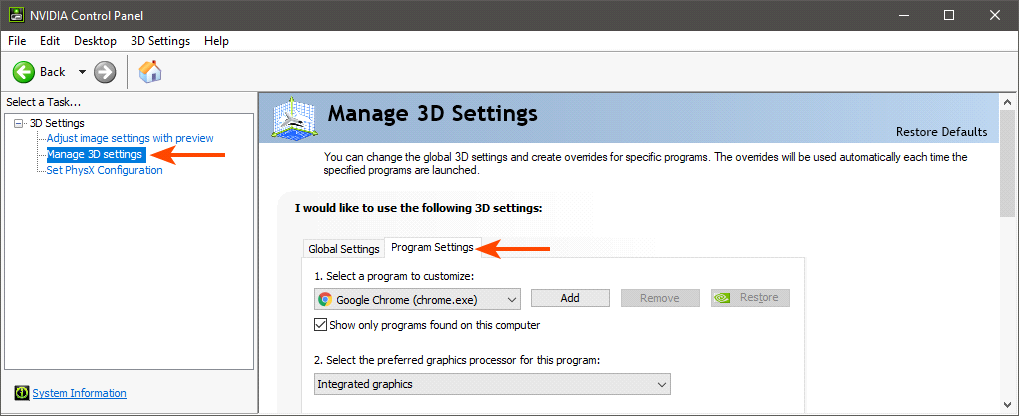
2. Click on Manage 3D Settings.
3. Click on the Program Settings tab.
4. Under 1. Select a program to customise, click the Add button.
5. Browse to the location of the Leapfrog Geo .exe file.
The default installation location is: C:\Program Files\Seequent\Leapfrog Geo4.5\bin\Geo.exe.
6. Once selected, click Open.
7. Under 2. Select the preferred graphics processor for this program, select the High-performance NVIDIA processor.
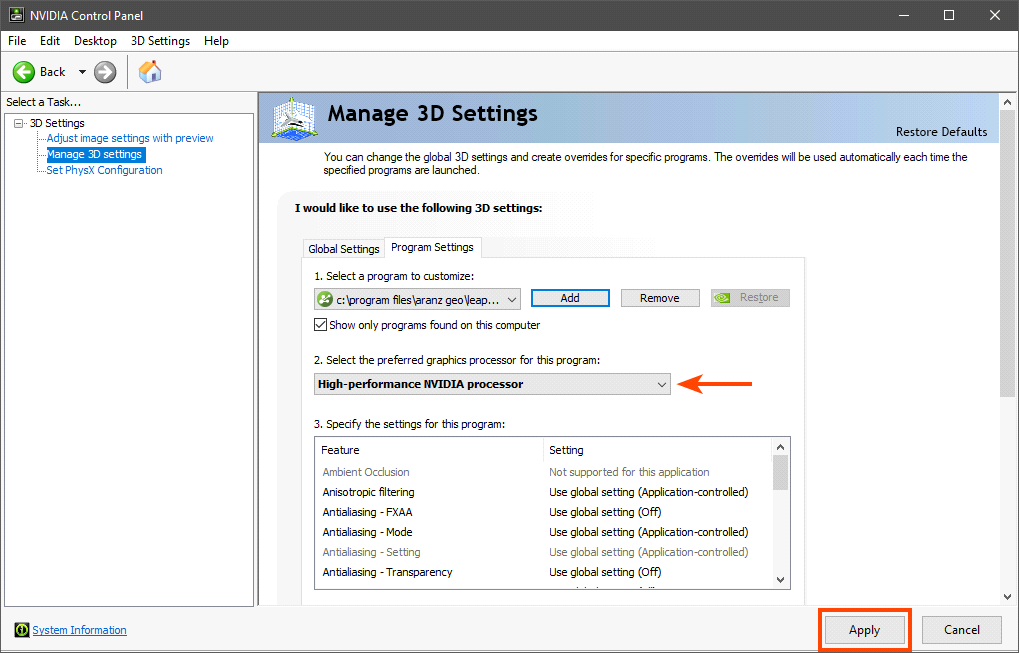
8. Click Apply.
On occasion, the graphics switch will be unsuccessful if the dedicated graphics card has old drivers. To ensure a successful switch, update your drivers before switching to your dedicated graphics card.
Once the drivers are updated and you have switched the in-use graphics card to your dedicated card, verify these changes have been successfully made.
9. Open the System Info window.
10. Check that the higher-powered NVIDIA card is now being used and that the drivers show the latest versions.
Running the Graphics Test
Leapfrog Geo can run in one of three acceleration modes. These modes are selected by clicking on the button at the bottom of the main window:

See 3D Acceleration Mode in Settings for more information on these settings.
A newer computer will run in Full Acceleration mode without issues. However, if you are running Leapfrog Geo on a computer that is more than five years old, it is a good idea to run the graphics test to test your computer’s graphics capabilities.
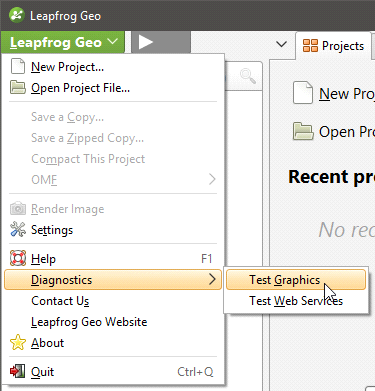
To start the test, open Leapfrog Geo and select Test Graphics from the Leapfrog Geo > Diagnostics menu:
The graphics test displays a series of image pairs that test your computer’s capabilities for the currently selected acceleration mode. For each pair, compare the images:
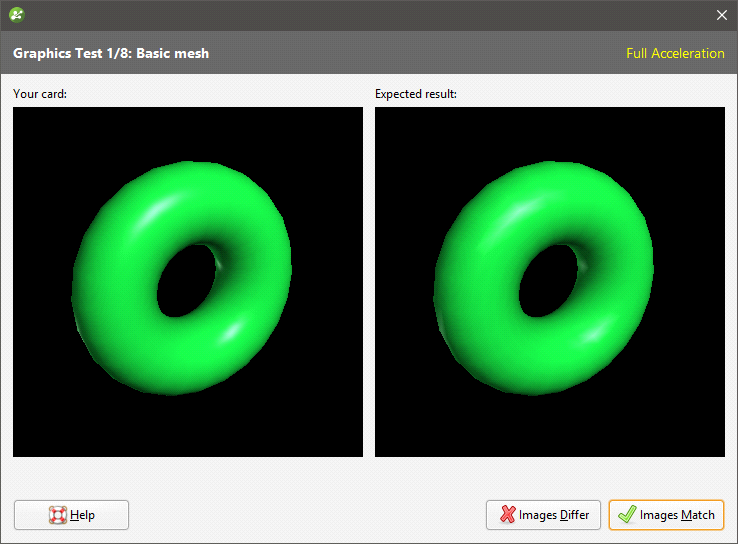
Even if the differences are slight, click the Images Differ button. If the images match, click the Images Match button. The next test will be displayed.
At the conclusion of the test, the result is displayed. If one or more tests have failed, information about solving problems will be displayed.
If you click on Save Report, you will be prompted to save the file on your computer.
If the test has failed, try switching to a different acceleration mode and running the test again. If possible, avoid using Software Rendering as it can be very slow.
If you cannot resolve the problem, save a copy of the graphics test report and contact technical support as described in Getting Support. Be sure to include information about your system copied from the About > System Info tab.
The Leapfrog Geo Projects Tab
When you launch Leapfrog Geo, the main window will appear with the Projects tab displayed:
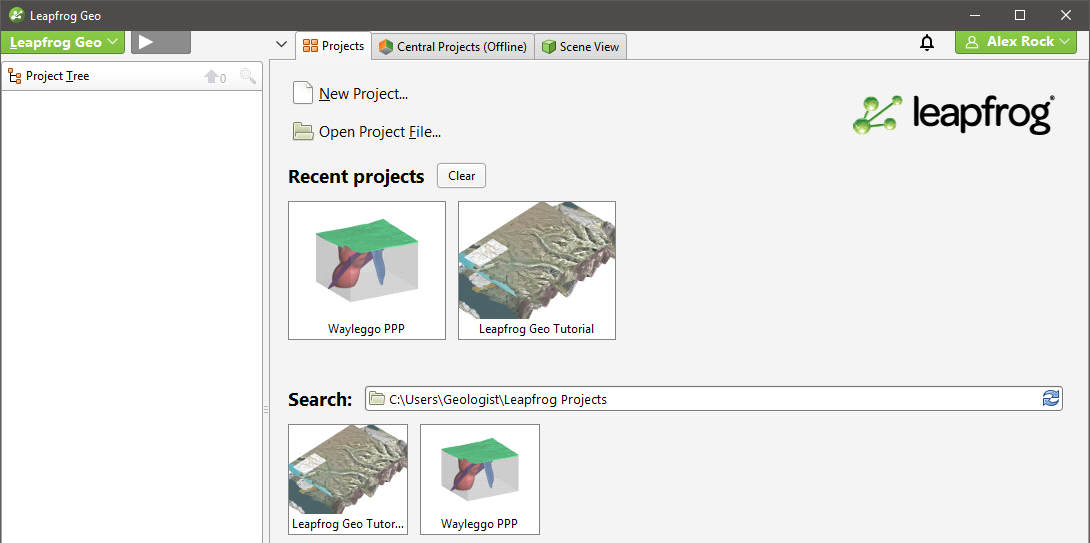
Thumbnails for the most recent projects are displayed in the Recent projects list. The second set of thumbnails is for projects contained in the Search folder:
- Click on the folder button (
 ) or press the F5 key to change the Search folder. The Search folder is useful if you have one folder in which you keep most of your Leapfrog Geo projects.
 - Click on the Refresh button (
 ) or press the F4 key to update the list of projects in the Search folder.
Leapfrog Hydro projects are indicated in the Projects tab. See Converting Leapfrog Hydro Projects for more information.
Click on a thumbnail to open a project. You can also navigate directly to the required project file by clicking on Open Project File.
Once a project file has been opened, Leapfrog Geo switches to displaying the Scene View tab.
See Managing Leapfrog Geo Projects below for more information on saving, compacting and upgrading projects.
Managing Leapfrog Geo Projects
If you and your team need to share projects, see http://www.leapfrog3d.com/products/leapfrog-central for information about Central, which is a model management system that lets groups of Leapfrog users share projects. See the Central Integration topic for more information on how Central and Leapfrog Geo work together.
To create a new project, click New Project at the top of the Projects tab. The new project will be saved in the Search folder.
Leapfrog Geo project files use the extension .aproj. A folder is also created that contains information used by the project.
Do not change the name of your project folder or alter its contents. Doing so could render your project file unusable.
A .lock file is created when a project is opened. The .lock file protects the project from being moved while the project is open and from being opened by another instance of Leapfrog Geo, which can happen when projects are saved on shared network drives.
If processing and display of objects in your project is too slow and your project is stored on a network drive or on a USB drive, consider moving your project onto a local drive. Leapfrog Geo is optimised for working off your local hard drive, and working from network drives and USB drives risks corrupting the project.
Saving Projects
Leapfrog Geo automatically saves an open project each time a processing task has been completed or settings have changed. Projects are also saved when they are closed so that scene settings can be restored when the project is next opened.
Saving Zipped Copies of Projects
You can save a zipped copy of a project by selecting Save A Zipped Copy from the Leapfrog Geo menu. You will be prompted to choose a name and location for the zipped project. Click Save to create the zip file.
Saving Backup Copies of Projects
You can save a backup copy of a project by selecting Save A Copy from the Leapfrog Geo menu. You will be prompted to choose a new name and location for the saved project. Click OK to create the new project file. Leapfrog Geo will save a copy of the project in the location selected.
Once the backup copy is saved, you can open and use it from the Projects tab. Otherwise, you can keep working in the original copy of the project.
Compacting Projects
When you delete objects from a project file, Leapfrog Geo retains those objects but notes that they are no longer used. Over time, the project file will grow in size and data stored in the database may become fragmented.
Compacting a project removes these unused objects and any unused space from the database. When you compact a project, Leapfrog Geo will close the project and back it up before compacting it. Depending on the size of the project, compacting it may take several minutes. Leapfrog Geo will then reopen the project.
To compact a project, select Compact This Project from the Leapfrog Geo menu. You will be asked to confirm your choice.
Upgrading Projects
When you open a project that was last saved in an earlier version of Leapfrog Geo, you may be prompted to upgrade the project. A list of affected objects will be displayed. For large projects with many objects that need to be reprocessed, the upgrade process may take some time.
It is a good idea to back up the project before opening it. Tick the Back up the project before upgrading button, then click Upgrade and Open. Navigate to the folder in which to save the backup and click Save.
For large projects with many objects, upgrading without backing up the project is not recommended.
Converting Leapfrog Hydro Projects
Leapfrog Hydro projects can be converted to Leapfrog Geo projects. However, the process is one-way, and projects opened in Leapfrog Geo can no longer be opened in Leapfrog Hydro.
When you open a Leapfrog Hydro project, you will be prompted to save a backup before converting the project.
It is strongly recommended that you back up the project before converting it.
Got a question? Visit the My Leapfrog forums at https://forum.leapfrog3d.com/c/open-forum or technical support at http://www.leapfrog3d.com/contact/support