Importing a Map or Image
Image formats Leapfrog Geo supports include:
- PNG Files (*.png)
- JPEG Files (*.jpg, *.jpeg)
- TIFF and GeoTIFF Files (*.tiff, *.tif)
- Windows Bitmap Files (*.bmp)
- Graphics Interchange Format Files (*.gif)
If images being imported contain georeference data, that information is assumed to be correct. You can, however, edit the information if you need to.
In Leapfrog Geo, three markers (![]() ,
, ![]() ,
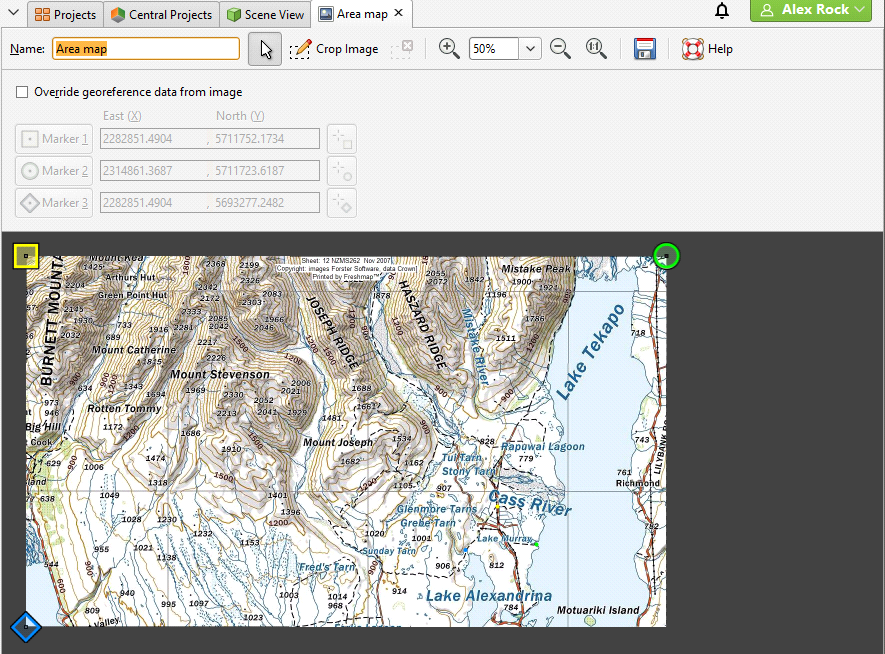
, ![]() ) are used to display the georeference data for imported images. You can see these markers in the scene when you double-click on an imported image, which opens a tab that has tools for cropping the image and editing its georeference data:
) are used to display the georeference data for imported images. You can see these markers in the scene when you double-click on an imported image, which opens a tab that has tools for cropping the image and editing its georeference data:
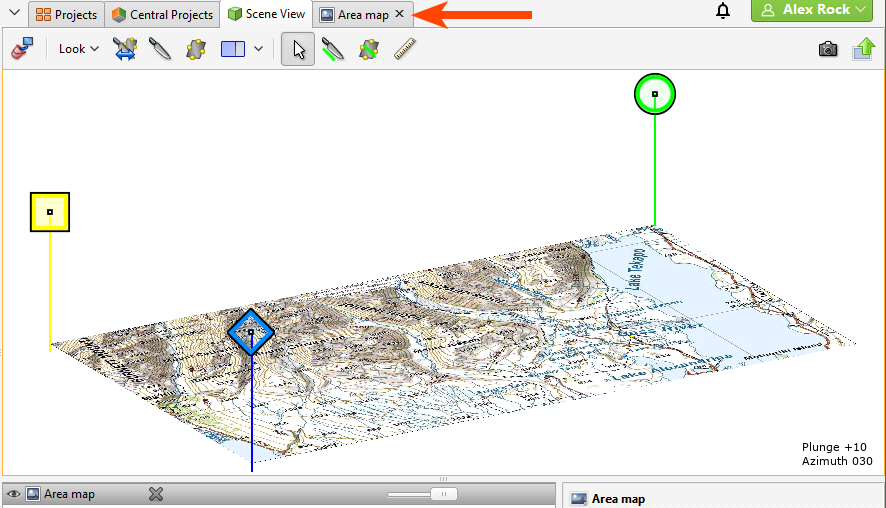
When you switch back to the scene, you can see the georeferencing markers:
The rest of this topic describes how to work with imported images in Leapfrog Geo. It is divided into:
- Importing a Single Image
- Importing Multiple Images
- Cropping Images
- Manually Georeferencing Images
- Overriding Georeference Data
- Exporting a Georeferenced Image
Importing a Single Image
To import a single image, right-click on the GIS Data, Maps and Photos folder and select Import Map. Navigate to the folder that contains the image, select the file and click Open.
- If the image contains georeference data, it will be imported into the GIS Data, Maps and Photos folder.
- If the image does not contain georeference data, the Import Map window will be opened so you can add the georeference data. See Manually Georeferencing Images below. Once you have georeferenced the image, click Import. The image will be imported into the GIS Data, Maps and Photos folder.
Importing Multiple Images
There are two ways to import multiple images:
- Right-click on the GIS Data, Maps and Photos folder and select Import Map. Navigate to the folder that contains the files you wish to import. Select the images and click Open. The images will be imported and added to the GIS Data, Maps and Photos folder.
- In the File Explorer, select all the files you wish to import. Drag and drop them into the GIS Data, Maps and Photos folder in Leapfrog Geo.
All images will be imported and added to the GIS Data, Maps and Photos folder. If an image does not contain georeference data, you will need to open the image and add the information manually, as described in Manually Georeferencing Images below.
Cropping Images
Images larger than 16384 by 16384 pixels will be scaled down. Reducing your images in size below this limit will avoid scaling. You can scale down images in an external image editor, or you can crop imported images in Leapfrog Geo.
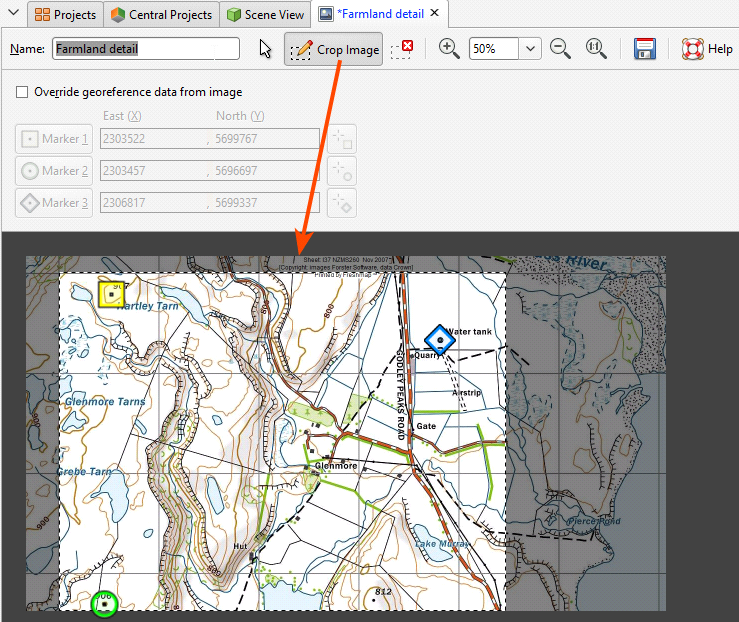
Cropping an image to only the area of interest will reduce video RAM usage and may improve graphics performance. To crop an image, double-click on the image in the project tree. In the window that appears, select the Crop Image button (![]() ) and then drag around the part of the image you wish to use.
) and then drag around the part of the image you wish to use.
Click on the Remove Crop button (![]() ) to clear the cropping.
) to clear the cropping.
Manually Georeferencing Images
If an image does not contain georeference data, you will need to add it manually by adding the three reference markers (![]() ,
, ![]() ,
, ![]() ) to the image. To select a marker, click on its marker button (Marker 1, Marker 2 or Marker 3), then move it to the required location on the image using the mouse or the arrow keys.
) to the image. To select a marker, click on its marker button (Marker 1, Marker 2 or Marker 3), then move it to the required location on the image using the mouse or the arrow keys.
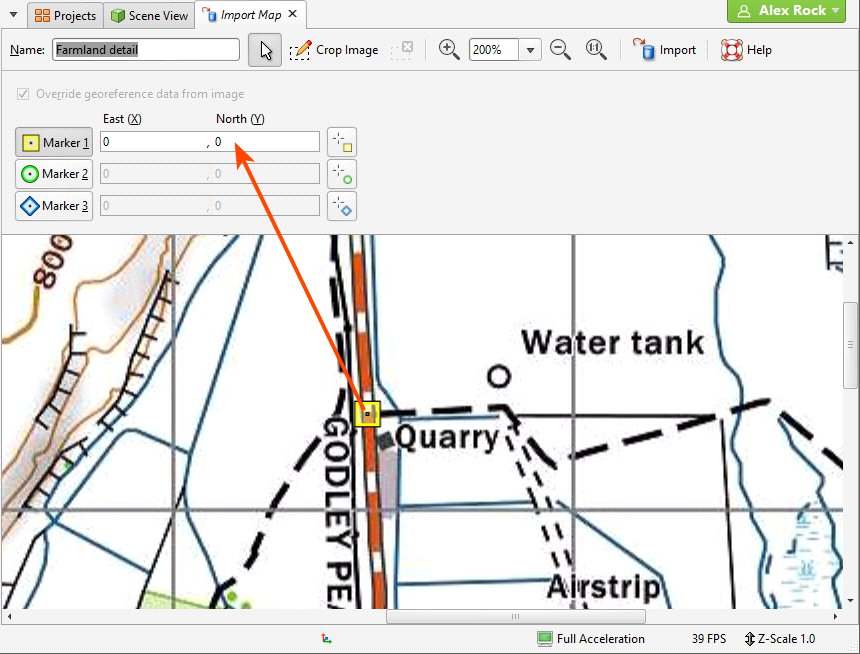
Once each marker is correctly positioned, enter the real-world X and Y coordinates for each marker:
There are two ways to do this:
- Enter the coordinates for each marker in the East (X) and North (Y) fields. As you enter the coordinates, the positions of the markers will be displayed in the scene.
- Copy coordinates from the scene using the three scene markers (
 ,
,  ,
,  ).
).
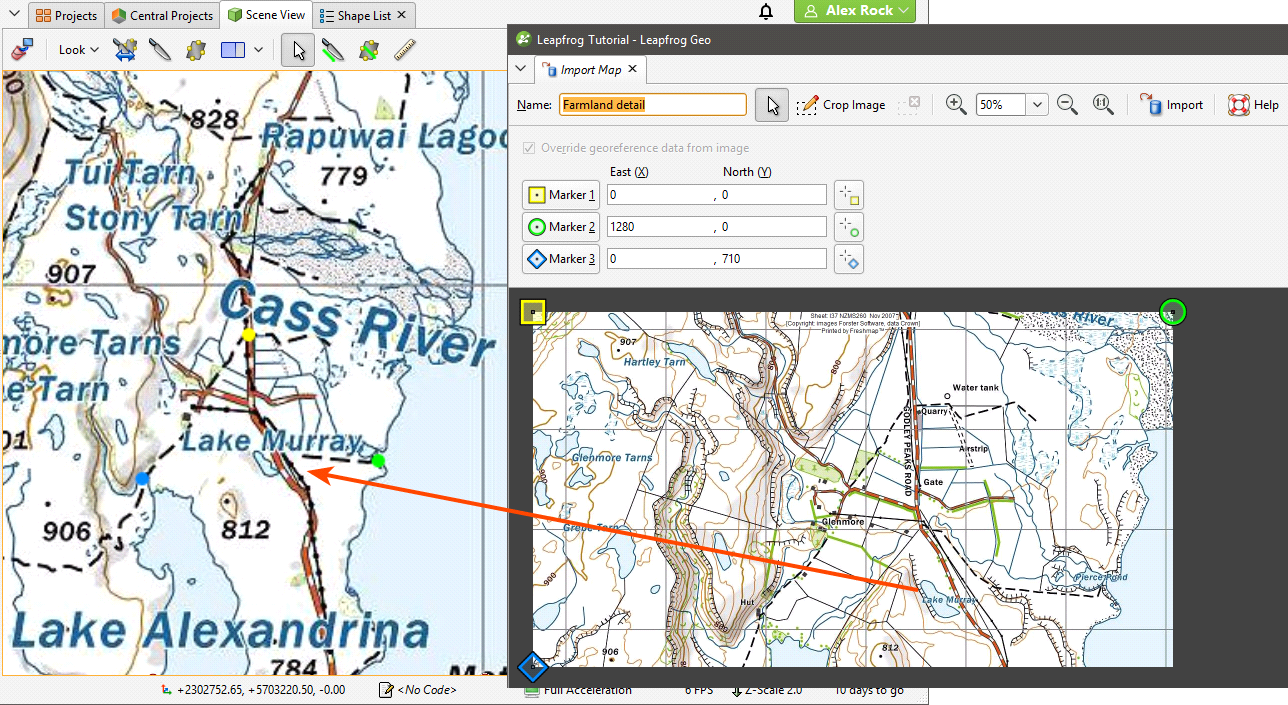
The second method is useful when you already have other objects correctly georeferenced in the project. For example, if you have a larger map in the project and wish to import a more detailed map, you can copy the coordinates from the georeferenced map to the detailed one. To do this, move the image’s tab so you can see enough of the scene to work in both windows:
Next:
- In the Import Map tab, position the marker (
 ,
,  ,
,  ) on the image being imported.
 - Click the corresponding copy coordinates marker (, , ).
- Zoom in to the point in the scene window where you wish to place the marker and click.
The coordinates in the scene will be copied to the Import Map tab.
Overriding Georeference Data
If an image being imported contains georeference data, the image will automatically be imported and added to the GIS Data, Maps and Photos folder. To edit its georeference data, double-click on the image to open it and tick the Override georeference data from image box. Edit the information as described in Manually Georeferencing Images above.
Exporting a Georeferenced Image
Leapfrog Geo exports georeferenced images as GeoTIFFs. To do this, right-click on it in the project tree and select Export. You will be prompted for a filename and location. Click Save.
Got a question? Visit the Seequent forums or Seequent support