Publishing to Central
When you publish a revision to Central, there are different choices you can make as to what objects are included and whether or not a Leapfrog Geo project is uploaded as part of the revision.
- When you select objects to publish to Central, the objects will be available for visualisation in the Central Browser and the Central Portal. You can choose to publish all objects in a project, but if your team’s discussion is limited to, for example, a subset of data or one or two models, it might be best to publish only those objects relevant to the discussion.
- When you choose to include a Leapfrog Geo project, other Leapfrog Geo users who have access to the project via Central can download a copy of the project and work in it.
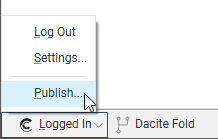
When you are ready to publish your project to Central, you can start the publishing process by clicking on the Central button in the lower left-hand corner of the screen and selecting Publish:
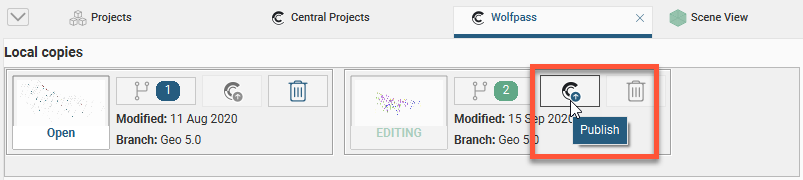
You can also select the Publish button (![]() ) in the Local copies panel:
) in the Local copies panel:
The rest of this topic describes the steps in publishing a project to Central. These are:
- Unfinished Publish Events
- Selecting Objects
- Setting the Project Workflow Stage
- Including the Project
- Adding Revision Information and Branching
- Preparing the Package
- Uploading the Package
Unfinished Publish Events
When you click Publish, you may receive a message saying there is an unfinished publish event:
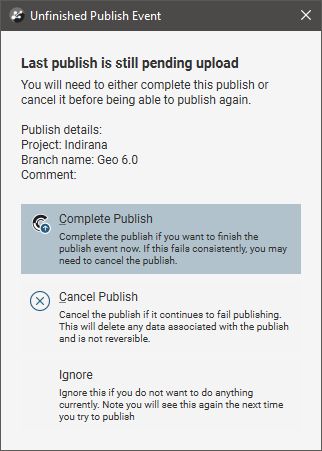
This occurs when a previous publish event was interrupted. Choose from the options presented.
If the publish event was abandoned, it can be removed via the Central Portal.
Selecting Objects
Select the objects you wish to publish from those available in the project.
Most data types in Leapfrog Geo projects can be published to Central. If a data object is not listed in the Publish window, then the publishing of that data type is not yet supported.
Although sub-blocked models can be published to Central, the dip will not be included.
When you publish a project revision to Central from Leapfrog Geo and wish to make a data object available for use in other projects, make sure you select that object from those in the project:
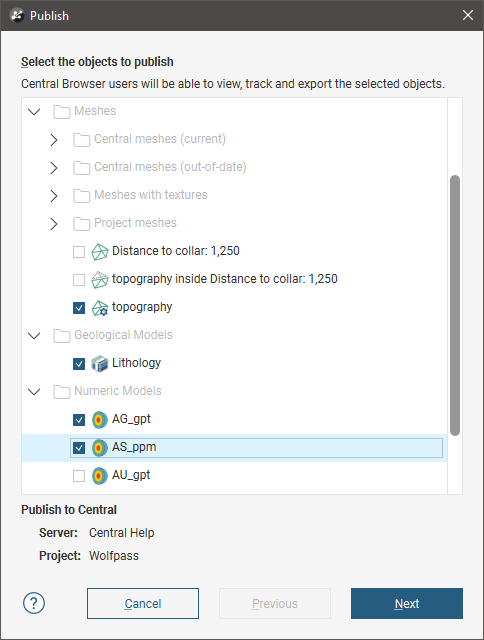
For example, in the project above, the data objects that will be available for use in other projects on the same Central server are:
- The Topography mesh
- The surfaces in the Lithology geological model
- The surfaces in the AG_gpt and AS_ppm numeric models
Unticked objects such as the Distance to collar mesh, the topography inside Distance to collar mesh and the AU_gpt numeric model will not be available.
Click Next to choose options for how the project will be uploaded.
Setting the Project Workflow Stage
Project stages are useful for advancing projects through an organisation’s processes. If the project is ready to be moved on to a different stage, select a different Project Workflow Stage from the list.
Project stages can later be changed in the Central Browser.
Including the Project
Select whether or not to include the Leapfrog Geo project. There are three options:
- No. The Leapfrog Geo project will not be published. Other Central users will not be able to download the project and work on it in Leapfrog Geo. They will, however, be able to review the published objects and their history in the Central Browser.
- Complete.This option publishes the complete Leapfrog Geo project, including stored modelling calculations. Other Central users will be able to download the project and work on it in Leapfrog Geo without reprocessing the project.
- Unprocessed. An unprocessed project has a smaller upload/download size because stored modelling calculations are removed. When an unprocessed project is downloaded again, all of the modelling calculations will need to be reprocessed from the underlying data. Other Central users will be able to download the project and work on it in Leapfrog Geo. Depending on the size of the project, reprocessing may take some time.
Click Next.
Adding Revision Information and Branching
Enter information about the new revision. If you want to create a new branch, click the New Branch button and enter a name for the branch.
Once you branch from a timeline, you cannot merge back into it. There’s no reason, however, that you can’t keep working in a branch and start considering that the main branch, if that’s the conclusion you and your team reach.
Preparing the Package
Click Next to begin the processes of packaging the project for publication.
Uploading the Package
Once the project has been packaged, there are two options for starting the upload:
- If you want the upload to begin automatically once the package has been prepared, tick the Auto upload box.
- If you want the option to cancel the upload once it has been packaged, leave the Auto upload box unticked. Once the project has been packaged, click Publish to upload the project to Central.
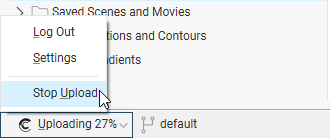
If for some reason you need to stop the upload, click on the Central button in the lower left-hand corner of the screen and select Stop Upload:
You can resume the upload by clicking Publish in the project history. You will be prompted to resume the unfinished publish event, as described in Unfinished Publish Events above.
If the upload is interrupted because the connection to the server is lost, you will be prompted to finish the publish event the next time you log in to Central.
If you exit Leapfrog Geo while a publish event is in progress, you will be warned that a publish event is in progress. You can:
- Cancel exiting Leapfrog Geo, in which case the publish event will continue.
- Confirm that you wish to exit Leapfrog Geo. The next time you connect to this Central server or publish from this project or from another project on the same server, you will be prompted to the resume the interrupted publish event. You can complete the interrupted publish event, if you wish, or ignore it.
Got a question? Visit the Seequent forums or Seequent support